1. What Causes TAC Violations in Photoshop?
Total Area Coverage (TAC), also termed Total Ink Limit (TIL), is the mathematical sum of the four process printing plates at any single coordinate:
In theory, CMYK can reach up to 400% (100% on all four plates). In practice, however, commercial high-speed offset and gravure presses cannot dry such heavy layers of wet oil-based inks. When liquid ink exceeds paper absorption capacity:
- Wet Ink Set-Off: Wet ink transfers from the front of one sheet onto the reverse side of the stacked sheet above it.
- Paper Curling & Wrinkling: The paper fibers become saturated and deform under high roller tension.
- Extended Drying Bottlenecks: Pallets sit in pressrooms for days, delaying folding, cutting, and lamination finishing.
For these reasons, ISO 12647-2 and Fogra standards mandate strict ceilings: 300% for coated paper (Fogra 39 & 51), 280% for uncoated offset (Fogra 52), and 240% for newsprint.
2. Why Basic Curves & Levels Adjustments Fail
The most frequent beginner mistake in Photoshop is applying an Image > Adjustments > Curves or Levels layer to pull down the darkest tones.
The Naive Curves Trap
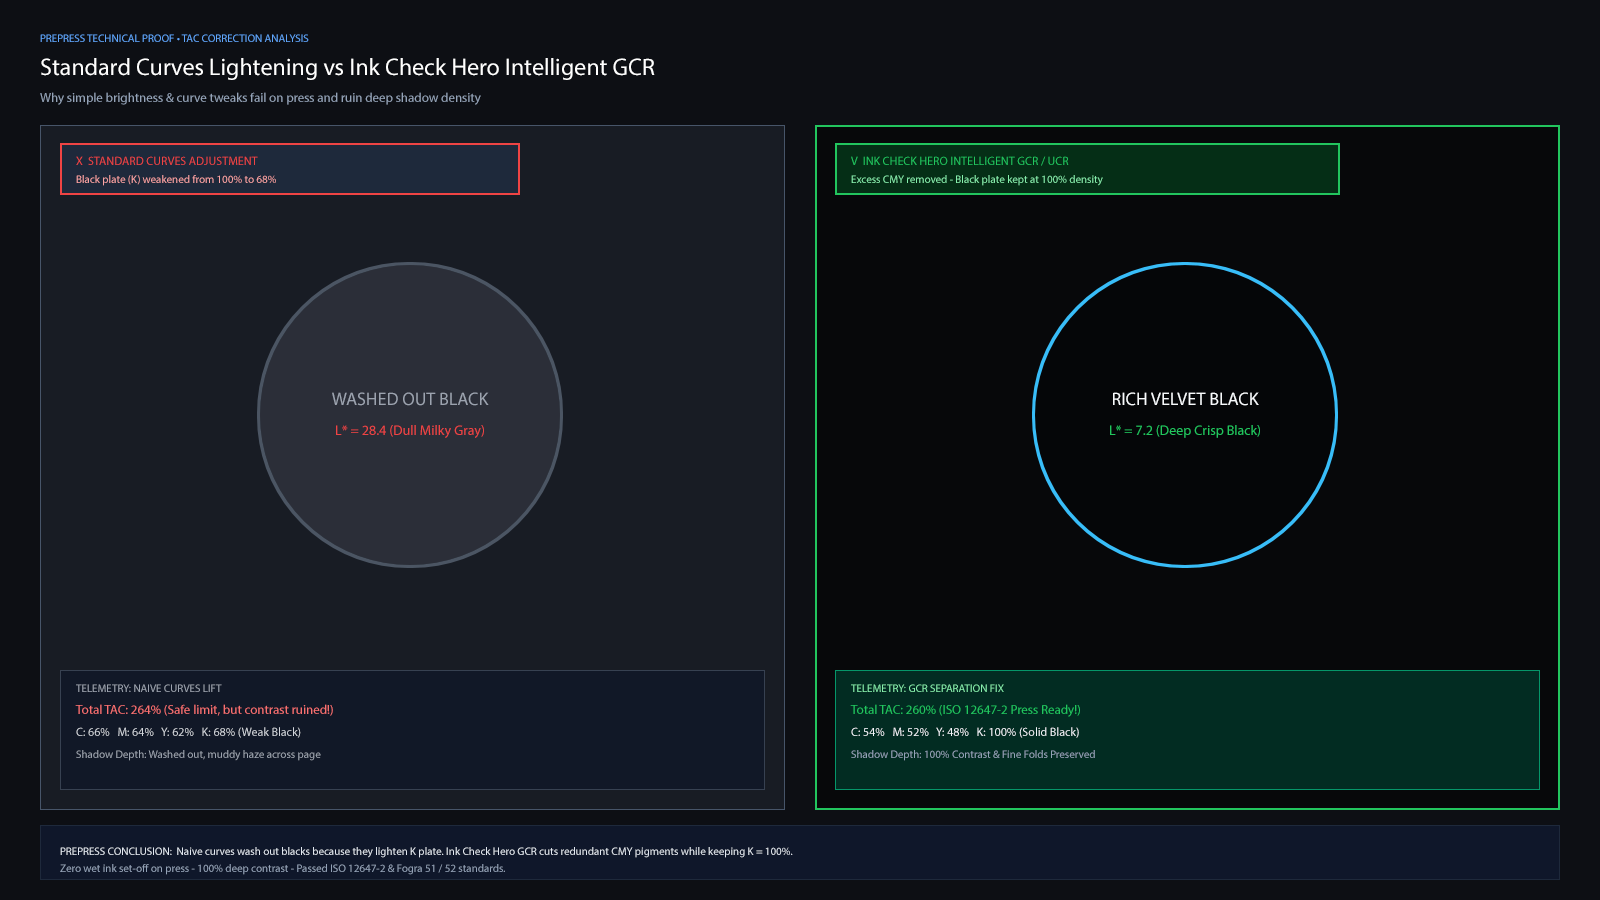
When you drag up the bottom-left point of a composite curve, you lighten all 4 channels indiscriminately. The Black (K) plate, which should remain solid at 100% density to anchor deep shadow details, drops to 65%–75%.
Result: Your deep velvet rich blacks turn into a washed-out, milky gray fog with L* lightness jumping from crisp 7.0 to an unacceptable 28.4.
The correct approach requires reducing only the chromatic pigments (Cyan, Magenta, Yellow) where they overlap redundantly, while preserving the Black plate at maximum density.
3. Visual Comparison: Naive Curves vs Intelligent GCR
Below is the side-by-side telemetry comparison measured in ISO 12647-2 prepress lab conditions:
| Parameter | Naive Curves Lift | InkCheckHero GCR / UCR |
|---|---|---|
| Total TAC | 264% (Safe, but flat) | 260% (Press Ready) |
| Plate Breakdown | C:66% M:64% Y:62% K:68% | C:54% M:52% Y:48% K:100% |
| Shadow Black L* Value | L* = 28.4 (Dull Milky Gray) | L* = 7.2 (Deep Crisp Black) |
| Detail Preservation | Muddied creases & hair textures | 100% Fine Edge Contrast Preserved |
4. The Traditional Manual Method: Custom CMYK Profile
In legacy Photoshop prepress workflows, operators configure a Custom CMYK separation engine:
- Open Edit > Color Settings (Cmd/Ctrl + Shift + K).
- Under Working Spaces, click CMYK > Custom CMYK...
- Set Separation Type to GCR (Gray Component Replacement).
- Set Black Generation to Medium or Heavy.
- Set Black Ink Limit to 100%.
- Set Total Ink Limit to 300% (or 280% for uncoated).
- Convert the image to Lab Mode, then convert back to CMYK using this custom profile.
5. The Modern Automated Solution: InkCheckHero UXP Plugin
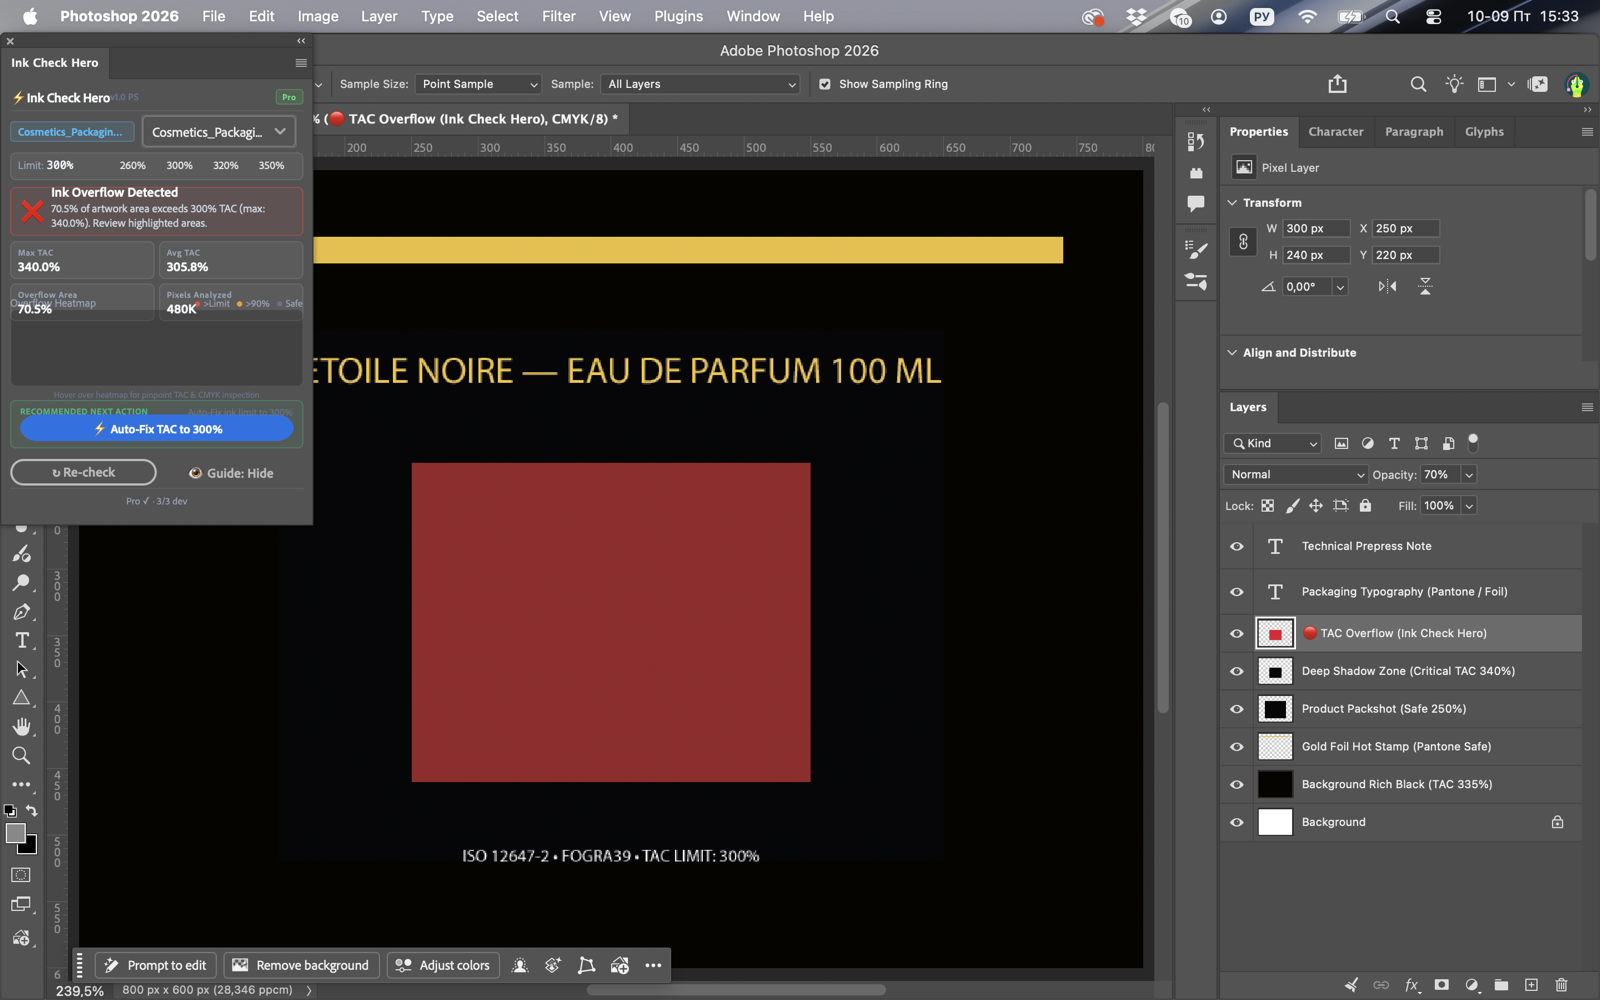
With the InkCheckHero CC plugin for Photoshop and Illustrator, you can fix ink coverage non-destructively in seconds without flattening layers:
Real-Time Background TAC Scan
Open your PSD in Photoshop. The InkCheckHero panel calculates the total ink limit for every pixel across all visible composite layers, displaying peak TAC and overflow percentages.
Select Target Press Limit Preset
Select 300% (Fogra 39/51 Coated), 280% (Fogra 52 Uncoated), or enter a custom limit mandated by your print house.
Click “Auto-Fix TAC”
The plugin generates an isolated top layer named InkCheckHero — TAC Fix containing only corrected pixels. Master layers, adjustment layers, and smart objects remain 100% untouched.
6. Pre-Press Dispatch Checklist
- Verify peak TAC does not exceed print shop specifications (e.g. 300% max).
- Ensure Black plate (K) remains at 100% in deepest shadows to guarantee high dynamic range.
- Confirm color profile matches paper stock (Fogra 51 for coated, Fogra 52 for uncoated).
- Inspect fine black typography (ensure 100% K overprint, no 4-color rich black on body copy).